
 中文
中文 021-6525 3206
Standard evaporation source crucible charging operation
CF flange fastening installation operation steps and precautions.

Technical Support
 Your current location: Home > Technical Support > Practical explanation/FAQ > Standard evapor...
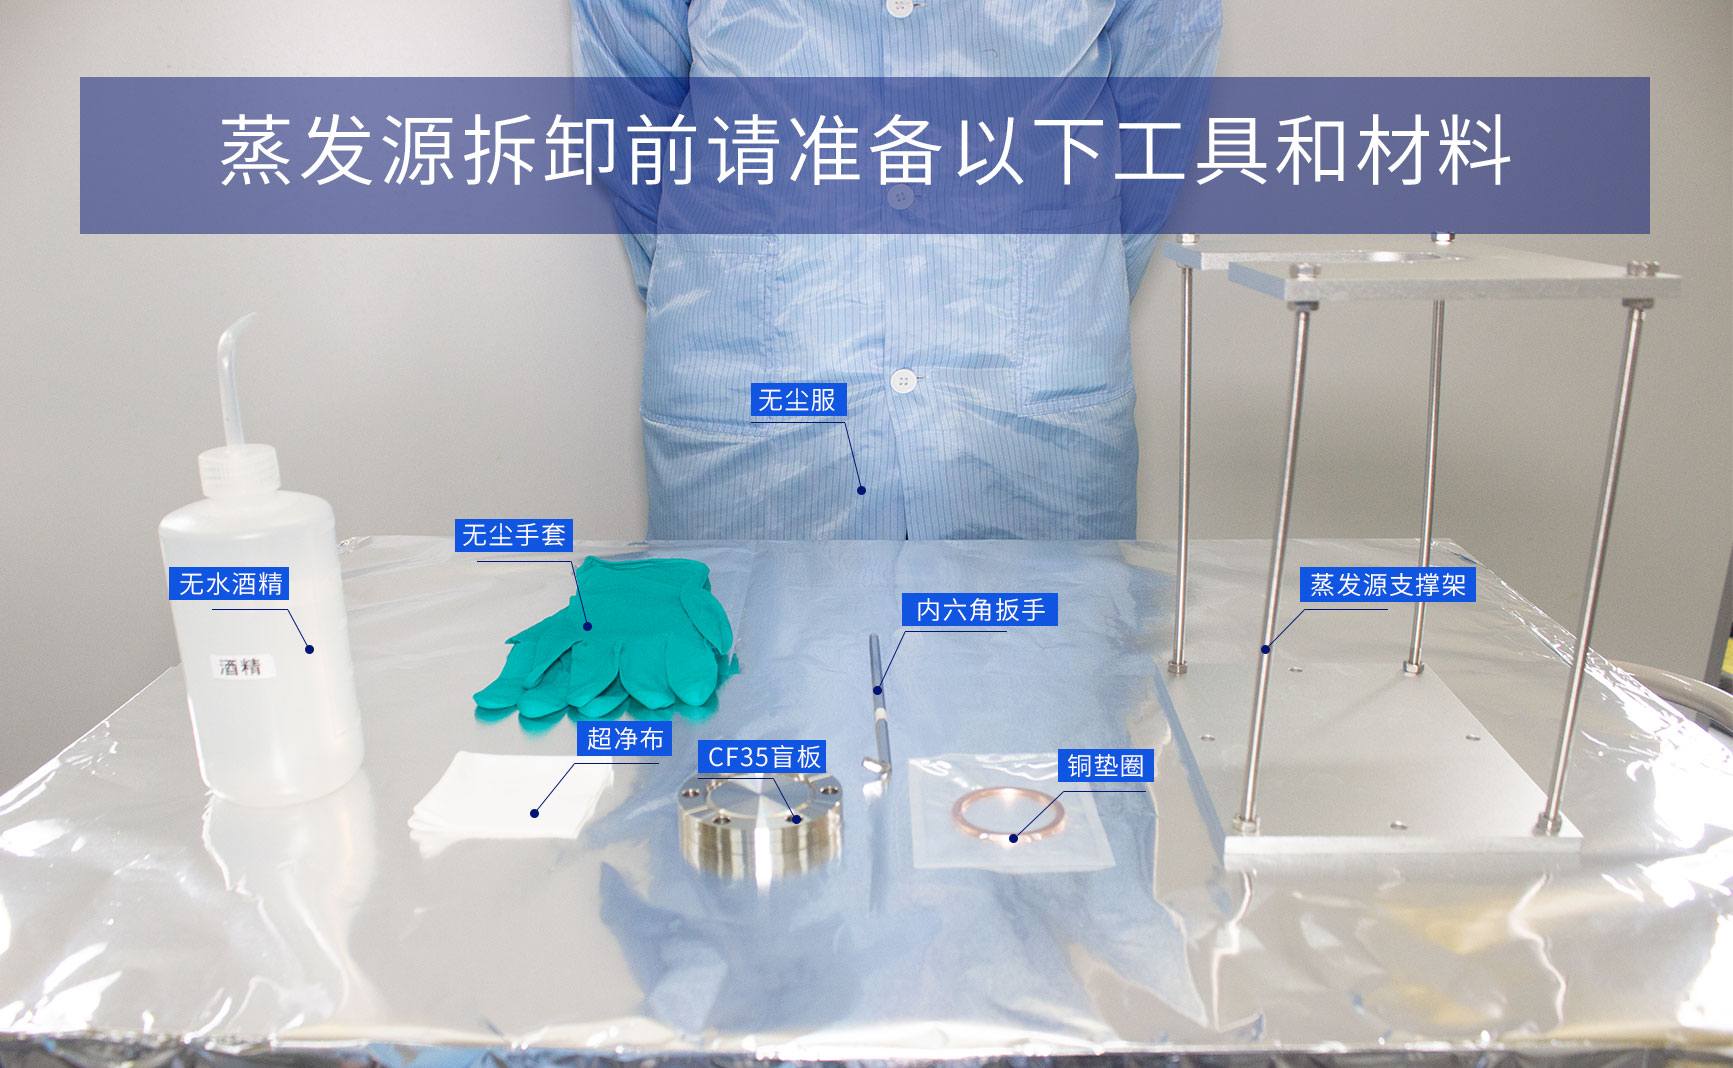
 Step 1: Prepare the following materials and tools
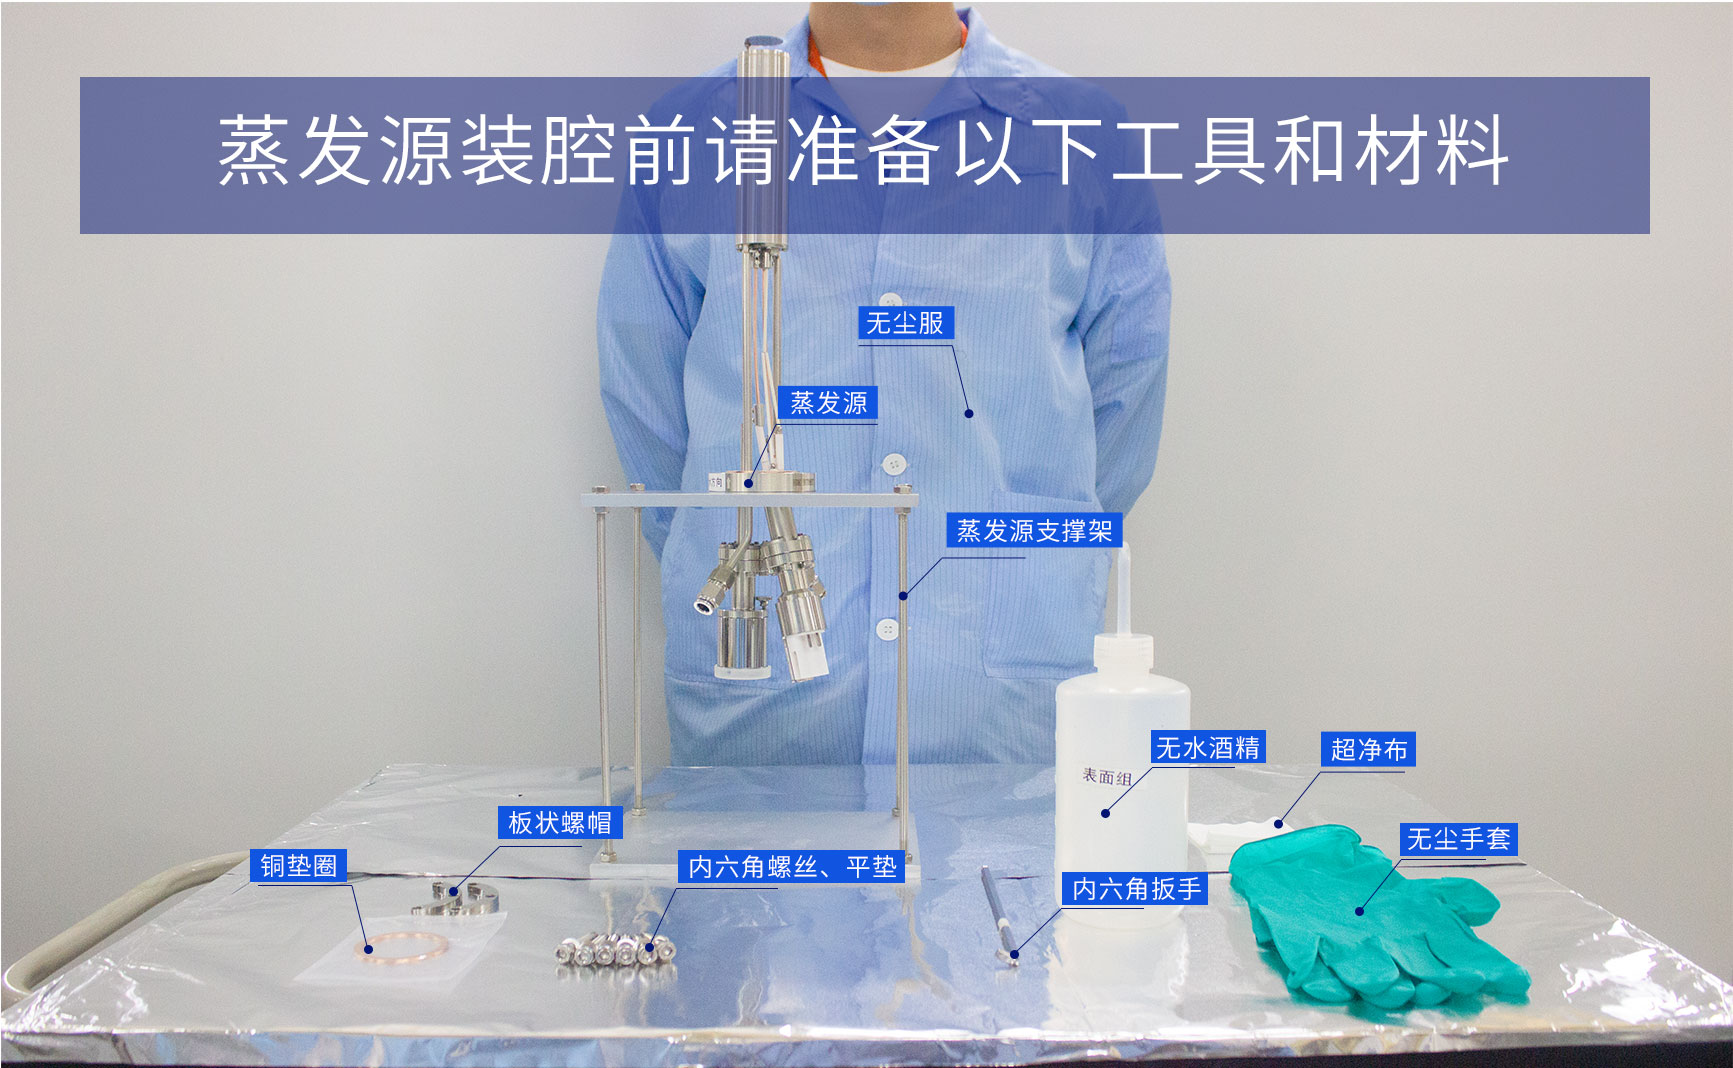
① CF35 copper washer, 1 piece
② Stainless steel hexagon socket screw (screw length depends on the mounting flange), 6 pieces
③ Ø6mm flat washer, 6 pieces
④ CF35 plate nut, 2 pieces (depending on the mounting flange)
⑤ Evaporation source, 1 piece
⑥ Evaporation source bracket, 1 piece
Tools:
① Dust-free gloves
② Anhydrous alcohol
③ Ultra-clean cloth
④ 5mm hexagon wrench
⑤ Clean clothes
Step 2: Safety check to ensure that the chamber has stopped evacuating and restored to atmospheric pressure with high-purity nitrogen, confirming that the materials in the chamber are non-toxic and harmless;
Step 3: Wear clean clothes and clean gloves, first loosen the locking screw on the magnetic coupling rotary drive, then rotate the magnetic coupling rotary drive to 0 degrees and tighten the locking screw (that is, the baffle is in the closed position) to ensure that there is no interference with the inner wall of the chamber;
Step 4: Use a clean cloth dipped in alcohol to wipe the evaporation source blade and copper gasket and visually check for defects. Place the copper gasket on the evaporation source flange blade or the installation flange blade (facing up);
Step 5: Use a clean cloth dipped in alcohol to wipe the flange blade, and carefully insert the evaporation source into the chamber to ensure that the evaporation source vacuum external parts do not interfere with other objects;

*In the fourth and fifth steps, it is necessary to check whether the sealing blade and copper gasket are intact and without scratches. If there are any abnormalities, the installation must be stopped.
Step 6: Check the direction of water cooling. If necessary, rotate the evaporation source to ensure that the water outlet is in a higher position. (i.e. upright installation, low in and high out; inverted installation, high in and low out);

Step 7: Slightly rotate the evaporation source flange back and forth to ensure that the copper gasket fits the flange and aligns the upper and lower flange through holes;
Step 8: Insert the stainless steel hexagon socket screw with a gasket into the through hole, and fix the other side with a plate nut (or M6 nut). Screw the screw into the plate nut (or M6 nut) and tighten the screws crosswise; tighten each screw clockwise 1/4 or 1/2 turn each time with appropriate tightness;

Step 9: Use a multimeter to measure the resistance value of the heating wire and the thermocouple to see if they are normal. You can compare them with the original factory report;

Step 10: Use a 5mm Allen wrench to tighten all screws evenly clockwise;
Step 11: Connect the water line and pressurize to ensure no leakage;
Step 12: Connect the power cord and thermocouple wire.

Steps to remove the evaporation source from the chamber

Step 4: Check the magnetic coupling rotation drive scale, confirm that it is at 0 degrees and tighten the locking screw (that is, the baffle is in the closed position) to ensure that there is no interference with the inner wall of the chamber;
Step 5: Use an Allen wrench to pre-loosen the screws in the flange through hole evenly;
Step 6: Hold the evaporation source with one hand and remove the screws with the other hand until all the screws are removed;

Step 7: Carefully remove the evaporation source, avoid collision with the inner wall of the chamber and the flange edge, and stand the evaporation source upright on the shelf;
Step 8: Use CF35 blind plate to seal the mounting flange. (If the evaporation source is loaded and then installed back into the chamber in a short period of time, just use clean aluminum foil to seal the installation flange edge)

*If the evaporation source and baffle are installed separately, it is recommended to check the baffle. As the system is used, raw materials will accumulate on the baffle. It is recommended to clean the polluted system or evaporation source regularly.


