 Your current location: Home > Technical Support > Practical explanation/FAQ > Standard evapor...
 Step 1: Prepare the following materials and tools;
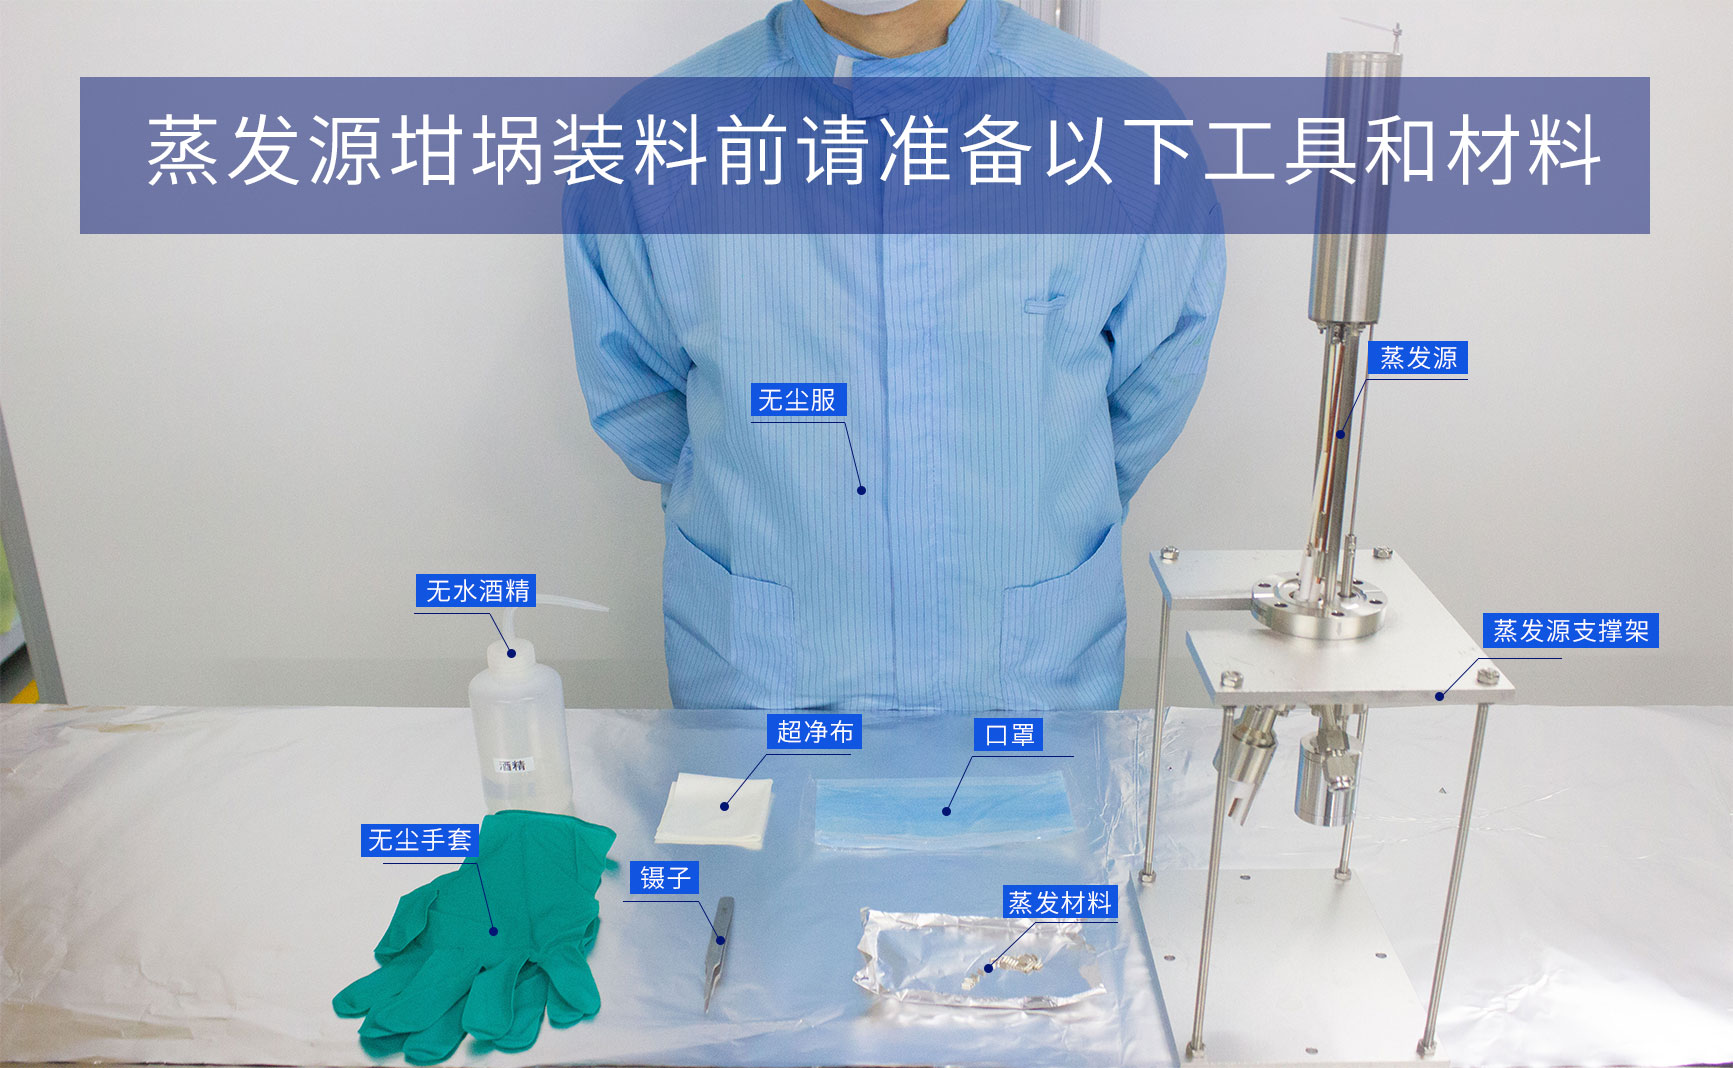
Materials: ① Evaporation material ② Standard evaporation source
Tools: ① Tweezers (clean) ② Dust-free clothing ③ Dust-free gloves ④ Mask ⑤ Aluminum foil for vacuum
⑥ Anhydrous alcohol ⑦ Ultra-clean cloth ⑧ Evaporation source support frame
Step 2: Safety check. Before operating the evaporation source, be sure to confirm what materials have been grown in the previous evaporation source. Some materials are toxic, such as Te, or flammable and explosive items, such as alkali metals. Special processes must be used in accordance with the MSDS specifications. The following is only for the loading of non-toxic and harmless materials.
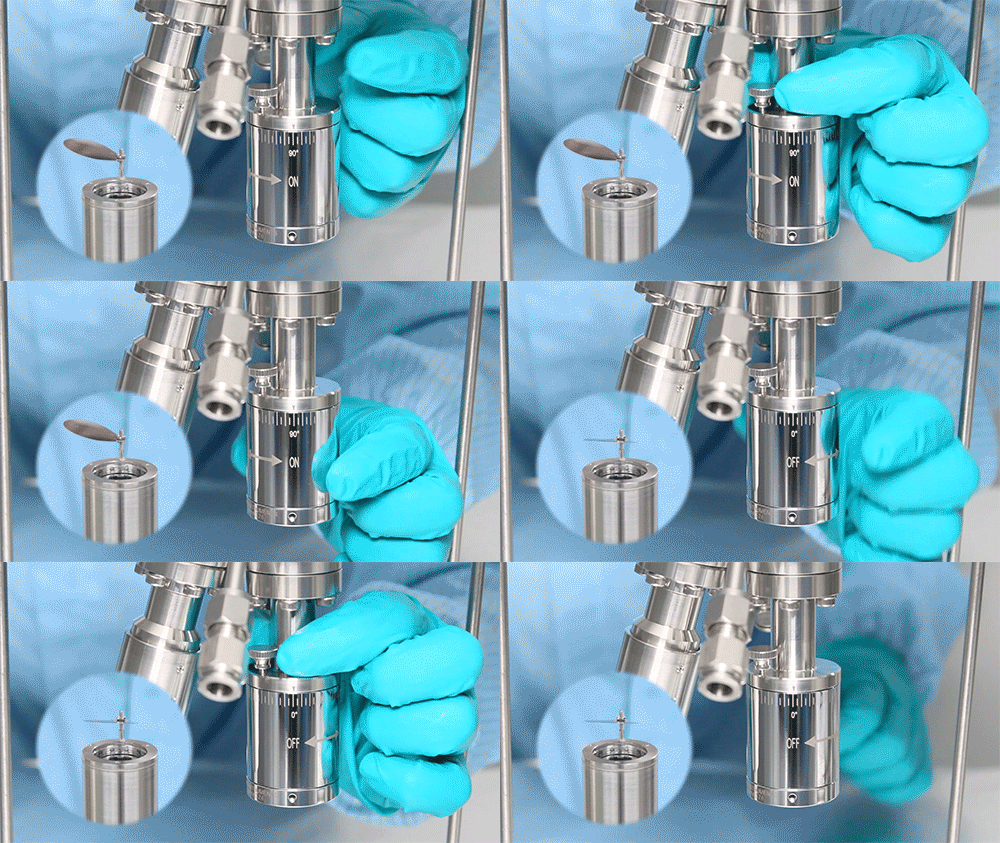
Step 3: After confirming safety, wear clean clothes, clean gloves and masks, first loosen the locking screw on the magnetic coupling rotary drive, then rotate the magnetic coupling rotary drive to 90 degrees and tighten the locking screw (that is, the baffle is in the open position).


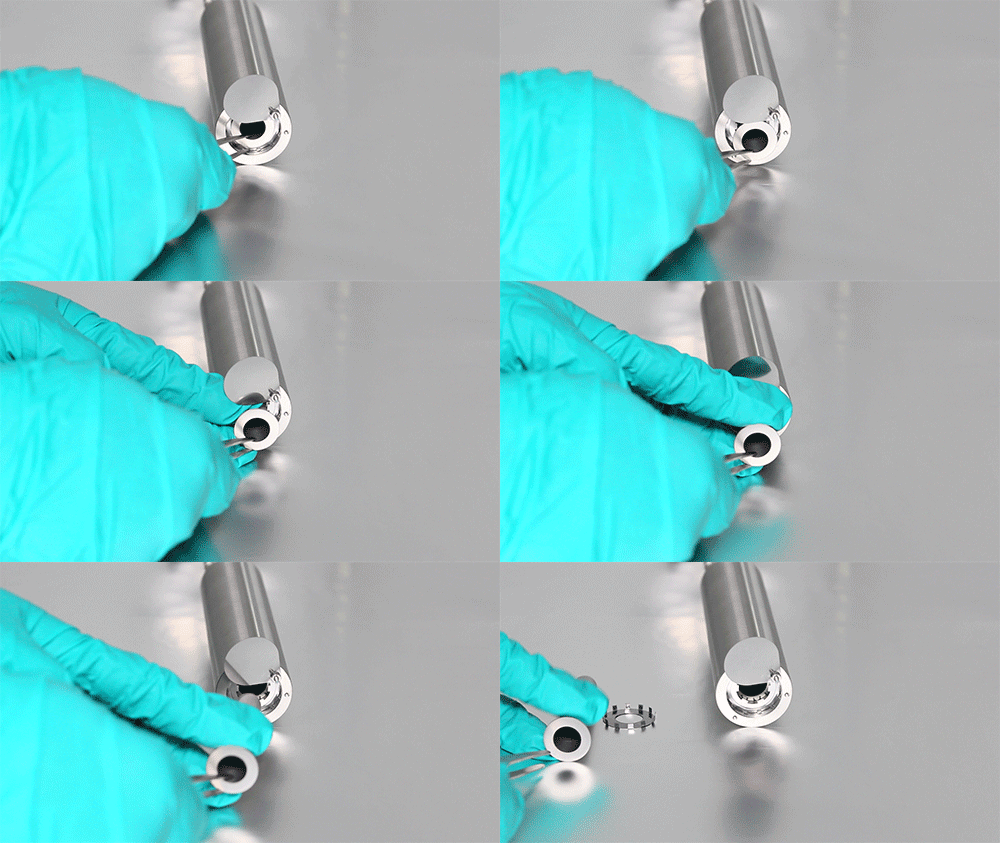
Step 5: Use a clean cloth dipped in anhydrous alcohol to wipe the tweezers, and use the tweezers to slowly remove the crucible press from the top of the crucible while placing it horizontally (to avoid the residual material falling), and temporarily place the crucible press on a clean aluminum foil.

Step 6: Carefully remove the crucible. Please note that some ceramic crucibles such as PBN are very fragile due to the wall thickness and material. Be sure to handle them with care.
Step 7: Visually inspect the crucible to confirm that there is no abnormality in the crucible. Check the contents of the crucible. It is generally not recommended to mix new and old materials, or mix different materials. If necessary, empty the crucible and use ultrasonic cleaning or replace it with a new crucible.
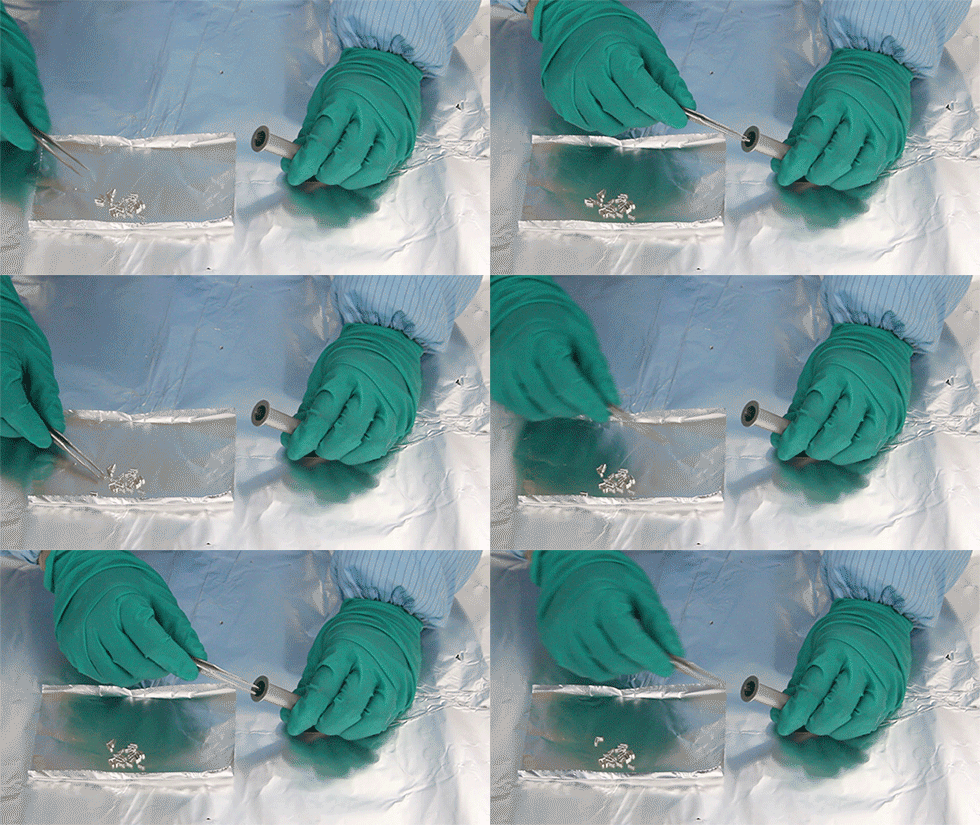
Step 8: Hold the crucible and tilt it 30-45 degrees. Use clean tweezers to slowly slide the material along the wall of the crucible. During the process, it is necessary to avoid large particles of material hitting the bottom of the crucible violently to cause damage to the crucible. It is recommended that the maximum loading amount should not exceed one-third of the crucible volume. When other materials need to be evaporated, a new crucible and crucible press must be replaced to avoid cross contamination.
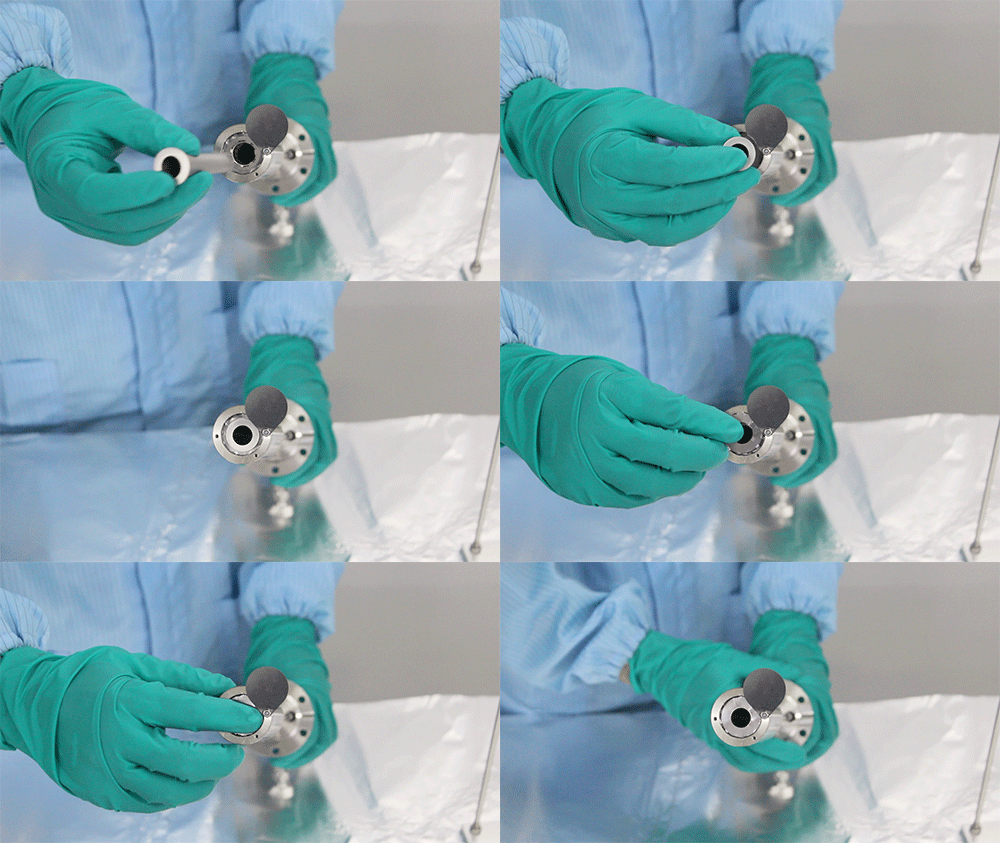
Step 10: After ensuring that the crucible is installed in place and stable, first loosen the locking screw on the magnetic coupling rotary drive, then rotate the magnetic coupling rotary drive to 0 degrees and tighten the locking screw (that is, the baffle is in the closed position).
Step 11: Place the evaporation source vertically on a dedicated support frame (to be loaded into the chamber) to prevent the crucible material from slipping out. For active and sensitive materials, it is recommended to enter the vacuum environment as soon as possible to prevent the material from oxidation or water absorption and degeneration. Before installation, check the resistance between the evaporation source electrodes and the grounding resistance, compare the factory data, and ensure that all parameters are normal.

Step 12: Crucibles, aluminum foils, or tools that come into contact with materials need to be stored, replaced/cleaned in a timely manner, and placed in categories to avoid cross contamination.
Precautions during installation
